Learn How to create realistic ice effect with this photoshop tutorialAplly a Stroke effect with the size of 1 px, Position set to Inside and Color set to #28a6ff. Aplly Color Overlay style, with the Opacity set to 75% and color set to #abc2e4.
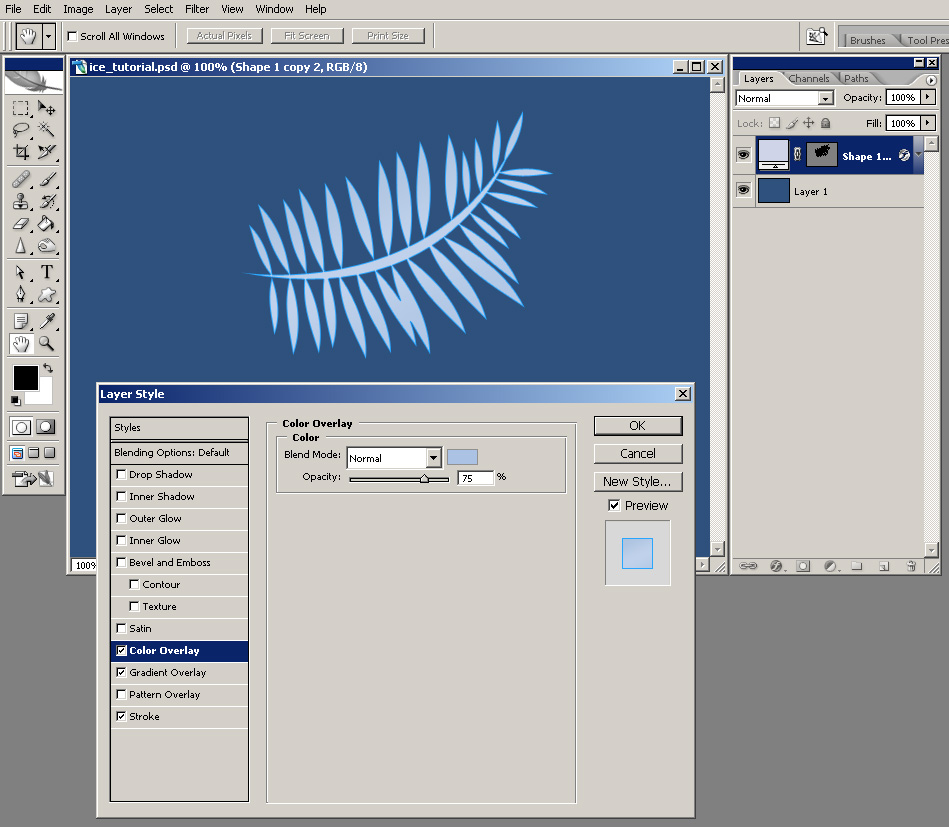 Apply a Bevel and Emboss style, leave all the settings default except your Gloss Contour which should change to Ring and your Shadow mode color which should be set to #3d5286.
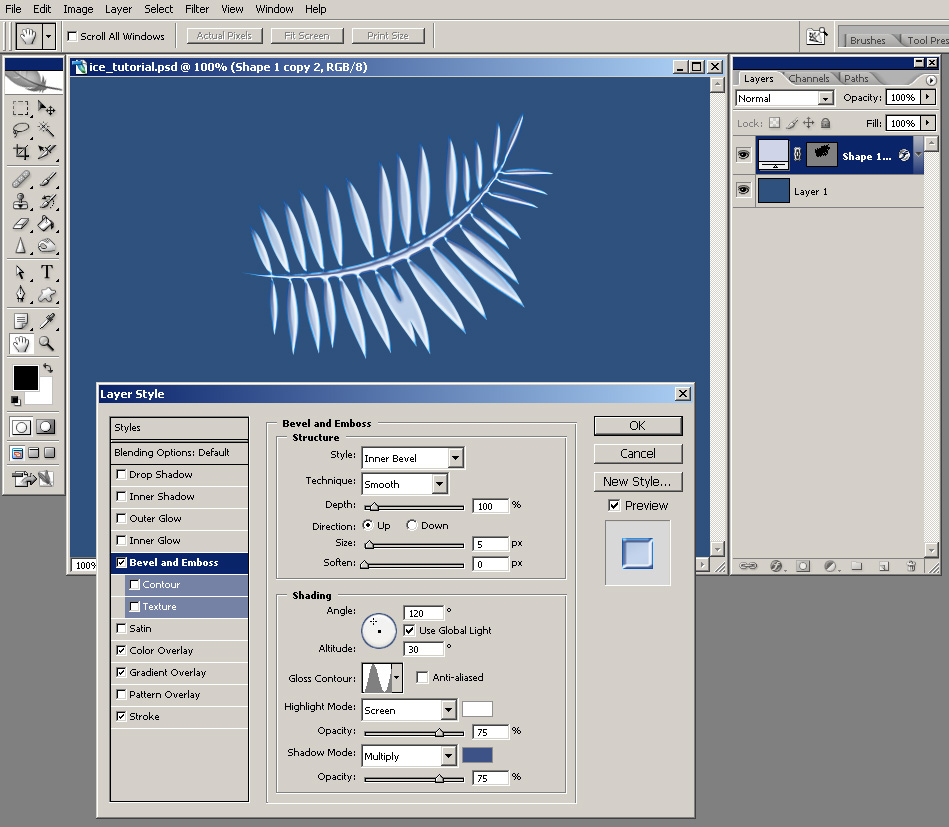 Add a Contour style and set your range to 100%, Contour to Cone and check Anti-aliased.
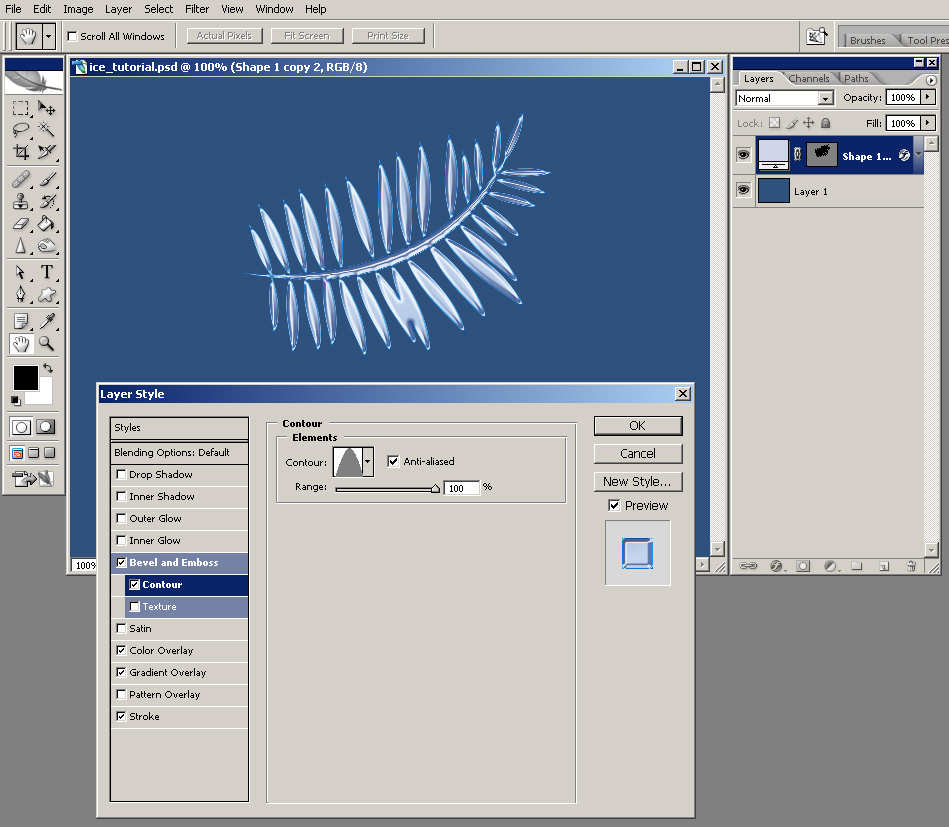 Add Texture, with the Pattern set to Wood and Scale set to 63%.
 Apply a Satin style, but change your Blend Mode to Normal, Opacity to 100% and color to #a6d5f5.
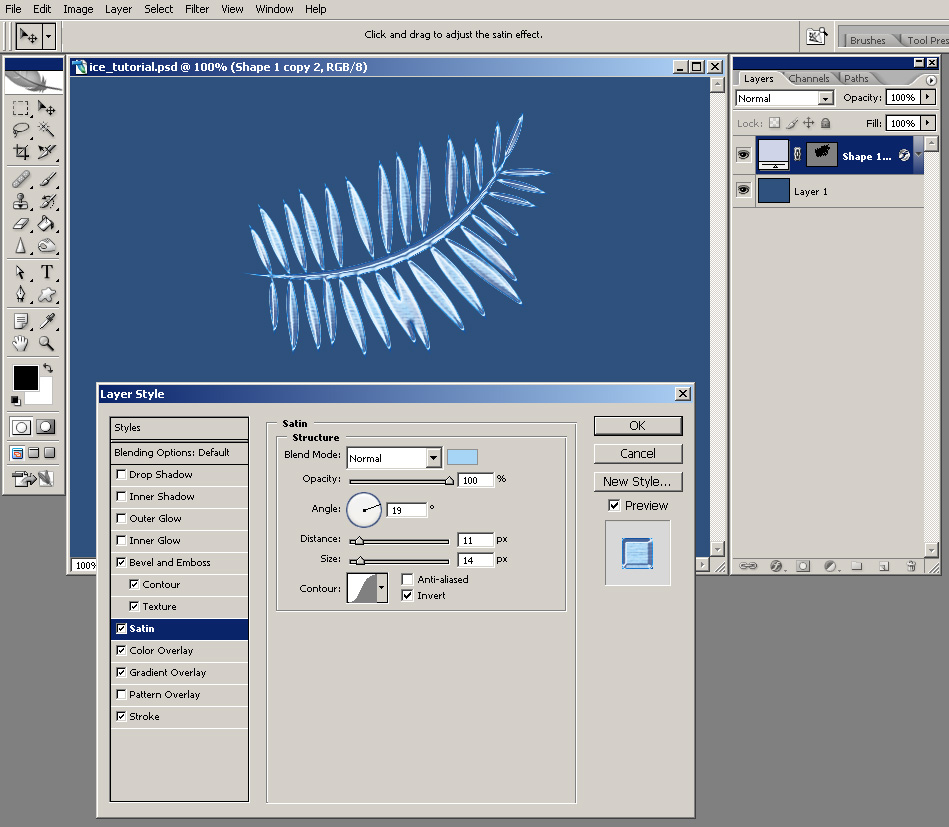 Add a Inner Glow, with the color changed to #2b81d9.
 Add a Outer Glow, with the color changed to #7dd9ff and the Opacity set to 15%.
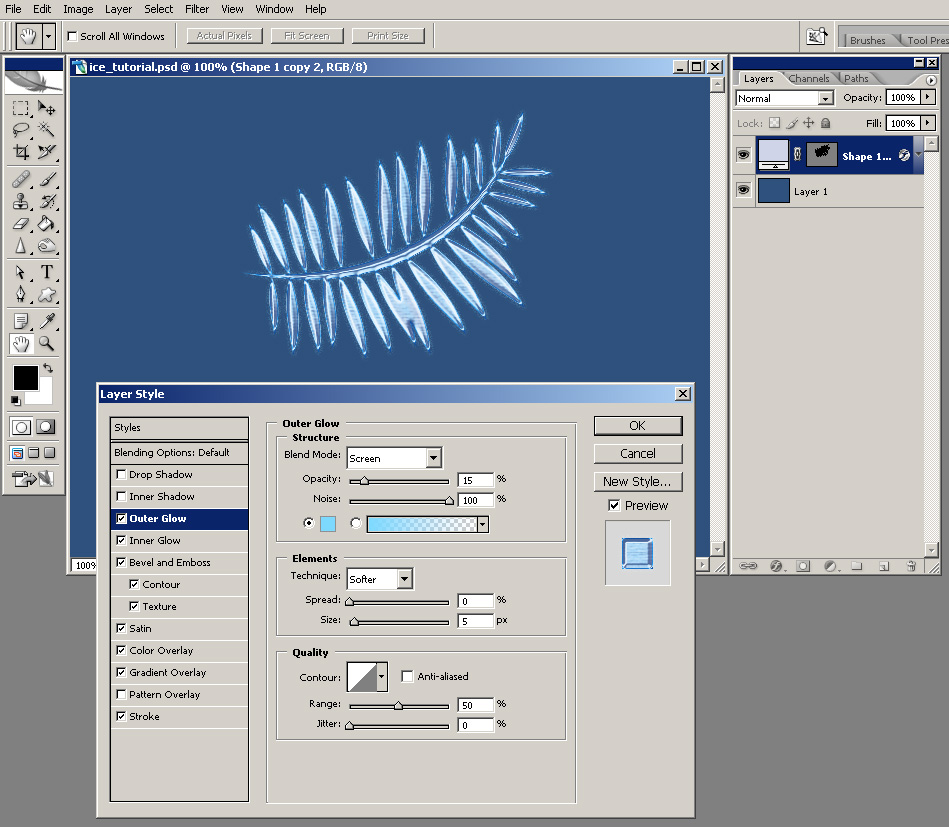 Add a Inner Shadow effect, with the color changed to #484a70.
 Add a Drop Shadow style, with the color set to #1b2a6a, Opacity to 40%. Uncheck Use Global Light and set your Angle to -45 degrees, Distance to 65 px, Spread 5% and Size 100 px.
 Now you have an ice effect that can be easily modified and apllied to any other object you want.
 I always try to take my photoshop tutorials a little futher and see what else can I come up with if I am continuously improving an image. Here is what I come up with for this tutorial after adding a few other effects:
 Click here t
Create realistic ice effect in photoshop
Subscribe to:
Post Comments (Atom)

0 comments:
Post a Comment